| Find Used Auto Parts |
| Find Junk Yards |
| Preferred Recyclers |
| UPC Directory |
| Used Engines |
| Used Transmissions |
| Auto Body Parts |
| Wheels |
| Used Headlights |
|
Interior Parts |
| Used Air Bags |
| Parts List |
| Visitor
Comments |
  |
| Diagnosing
& Replacing The Power Window Motor In An S10 Blazer Power window systems in late vehicles are built on 3 basic platforms. The scissors system is by far the most popular, and is what this article will show. Although the vehicle shown is a Chevy S10 pickup, most scissors systems (especially GM's) are very similar. |
|
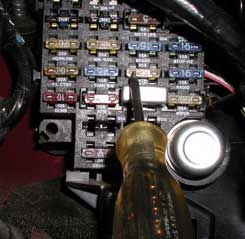
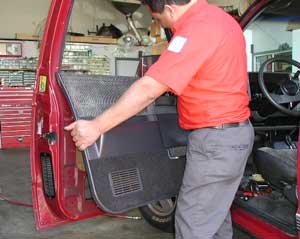
The first step in diagnosing a power window motor that doesn't move is to check the fuses and/or circuit breakers! Check for power with the ignition key in the on position. If the power checks out, remove the door panel and liner on the offending door. |
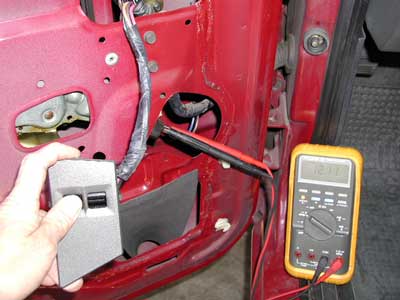
The next step in replacing a power window motor is to first verify that the motor is truly defective. With the door panel and liner removed and the power window switch plugged in, our technician checks the voltage at the motor. To properly check late model vehicles (most cars and trucks from 1980 up), the plus probe from the meter must be connected to one of the motor wires and the negative probe to the other wire. If you are using a digital meter, polarity is not important. With the switch depressed in both the up and down positions, we are getting a reading of 12.11 volts at the back of the motor. If the voltage reading in either position was 0 or below 11 volts, that would indicate that there is a problem elsewhere in the switches or wiring. Having 12 volts at the motor confirms that our switches and the wiring is working properly and the motor is defective. |
|
Also worth mentioning is that before replacing a motor, the mechanism must be thoroughly examined for any flaws that would prevent the motor and regulator assembly from moving or operating properly. A broken or binding regulator could cause similar symptoms. |
|
|
|
|
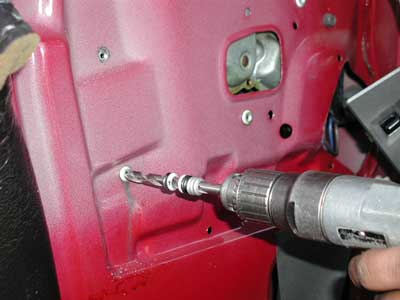
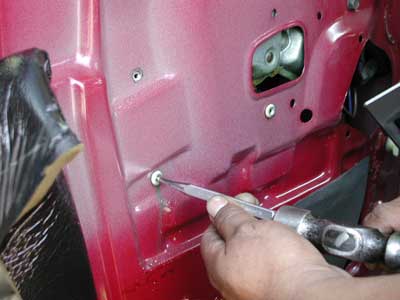
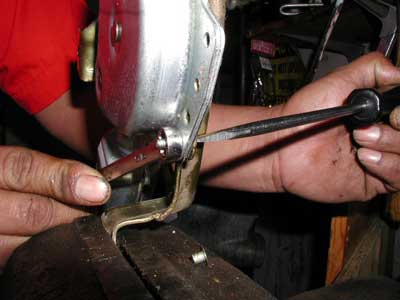
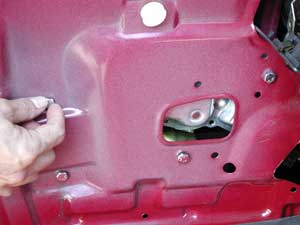
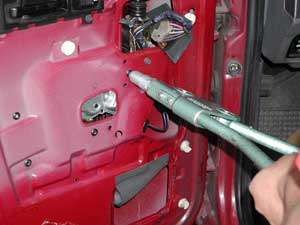
Once we are sure that the motor is defective, we will need to remove it and replace it. In most vehicles, it is necessary to remove the regulator from the door before removing the motor. Many late model vehicles use 1/4 inch rivets to hold the regulator in the door. To remove the rivets, a center punch and hammer are used to punch in the center pin of the rivets. These pins are made out of hardened steel and cannot be drilled. Before the rivets are removed, the window must be secured to keep it from falling. We like to use blue masking tape for this. A stick placed in the door will also work just fine. Next, the remaining rivet is drilled out with a 1/4 inch drill. It may be necessary to hold the head of the rivet with a pair of pliers to keep it from spinning. |
|
|
|
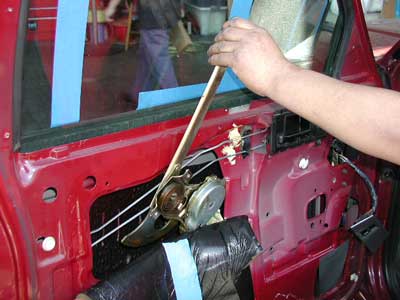
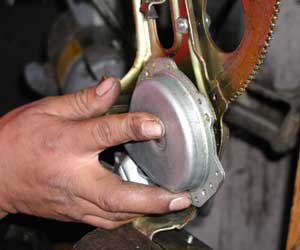
| With the rivets removed, the regulator arms should slide out of the channels on the bottom of the glass and the door. The regulator assembly is then removed from the door through the large access hole. |
|
|
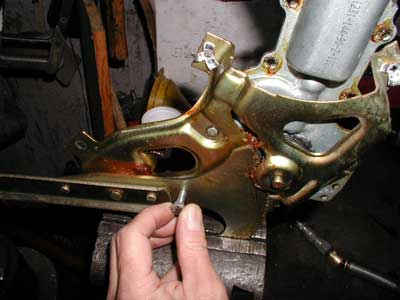
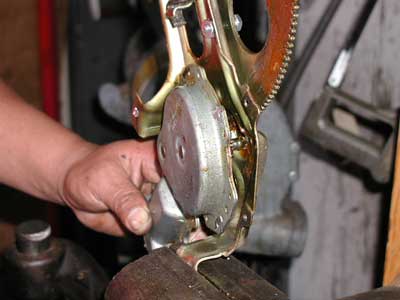
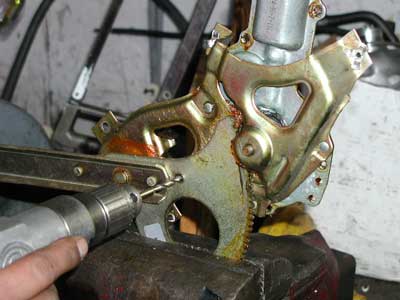
This step is important to prevent personal injury!!! Most regulators use a large clockspring to counterbalance the arm and gear. This spring can exert up to 40 pounds of force in some applications. When the motor is removed from the regulator, the arms will try to rotate in one direction while the chassis goes in the opposite direction. Just like a giant pair of spring loaded scissors!!! The regulator arm and gear must be locked to the chassis to prevent this from happening. There are several different ways that will work satisfactorily. This is the one that we prefer. The regulator and motor assembly is clamped in a bench vise. A 1/4 inch hole is drilled through the gear and chassis in a clear flat spot. A 1/4 inch bolt is then inserted in the hole and a nut finger tightened to it. This will prevent the chassis and arms from moving when the motor is removed. |
|
|

|
|
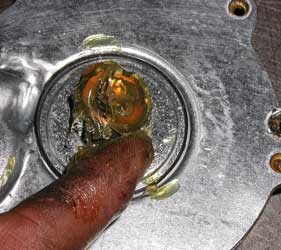
In the above photo, you can see the nut and bolt we placed in the regulator in the previous step. You can also catch a glimpse of the clockspring on the right hand side of the photo. There are three, 3/16 inch rivets holding the motor onto this regulator. They are easily removed by drilling off the heads with a 3/16 inch drill. With all 3 rivets drilled off, the motor is pulled away from the regulator. The remaining bits of the rivets must be cleared away from the regulator before the new motor is installed. |
|
|
|
|
A small dab of grease is placed on the gear of the new motor before it is installed. I believe the saying went, "An ounce of prevention is worth a pound of cure". The motor has multiple mounting holes. The holes need to be matched with the holes that are used originally and lined up in the exact position the old motor was in. |
|
|
The motor can be either riveted or bolted back onto the regulator. Our technician has chosen to use 3/16 inch machine screws and nuts to attach the motor to the regulator. The screws are placed in the same holes that the rivets were removed from. After the motor is secured to the regulator, the 1/4 inch bolt holding the gear and chassis together is removed. |
|
|
The regulator and motor assembly is placed back into the door and the plastic slides are lined up in their respective channels. A little grease on the slides and channels will help keep the windows operating smoothly. The regulator assembly can be reinstalled using 1/4 inch rivets like the factory (right photo) or 1/4 inch bolts and nuts (left photo). For most of us, getting hold of a rivet gun capable of handling 1/4 rivets is out of the question. With the regulator reinstalled, all that remains is reattaching the liner and reinstalling the door panel. |
| To find used replacement power window motors use our request form. |