| Find Used Auto Parts |
| Find Junk Yards |
| Preferred Recyclers |
| UPC Directory |
| Used Engines |
| Used Transmissions |
| Auto Body Parts |
| Wheels |
| Used Headlights |
|
Interior Parts |
| Used Air Bags |
| Parts List |
| Visitor
Comments |
  |
Diagnosing & Replacing a Window Regulator in a Pontiac Grand Am
Power window systems in late vehicles are built on 3 basic platforms. The Bowden cable system is fast becoming the mechanism of choice by most of the auto manufacturers. The Grand Am is just one the many cars that use this style of window mechanism. |
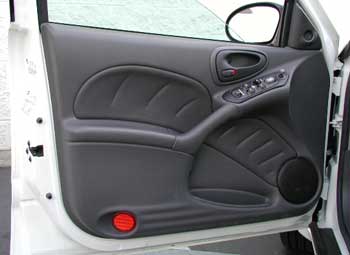
Before assuming that your car has a defective motor or regulator, a few quick checks are in order. First verify that the fuse or circuit breaker for the windows is OK. Most cars use the same power circuit for all of the windows, so if only one of them isn't working, it's a pretty safe bet that the fuses are OK. The car we're checking out is a 2002 Pontiac Grand Am 4 door sedan. We'll be looking at the drivers side (left) front window. The cable mechanism used in this vehicle is typical of many late model GM, Ford and Chrysler vehicles as well as most Asian imports. These systems are light weight, extremely adaptable and inexpensive to manufacture making them the system of choice. Unfortunately, high reliability isn't on the top of this list. Tap the window switch for the bad window and carefully listen for motor noise, etc. in the door. No noise may mean a faulty switch, motor, regulator or wiring. A motor whirring or grinding sounds may indicate a faulty regulator. In either case, we need to pull the door panel and do a little investigative work to be sure of the fault.
|
 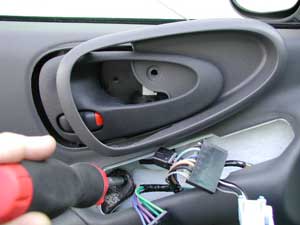
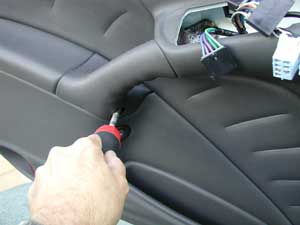
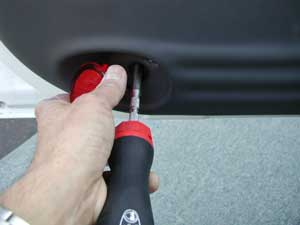
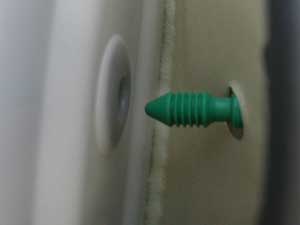
Taking off the door panel is a feat in itself on many late model vehicles. To get this panel off we start by carefully prying up the switch panel. There is a metal clip in the front that holds it in the armrest. With the switches removed and unplugged from the wire loom a hidden screw can now be removed. A single screw holds the trim panel around the handle in place. Below 2 more screws are found and removed. The one in the lower right photo is hidden behind a reflector. Sneaky...
|
|
|
|
|
|
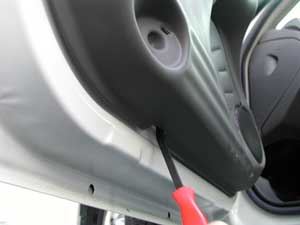
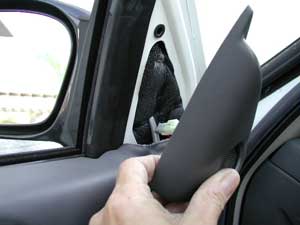
With all of the trim pieces and retaining screws removed, the panel is carefully pried up. There is an access hole/slot in the bottom of the door. Starting at this hole and we work our way across the bottom and then up the sides of the panel, using a door panel clip prying tool to carefully pry up all of the clips holding the panel to the door. The corner piece opposite the mirror is also pried off of the door and the wiring going to it is unplugged.
|
|
|
|
|
|
|
|
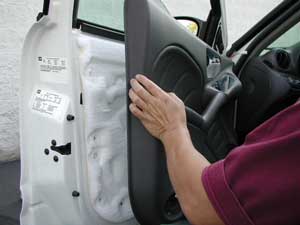
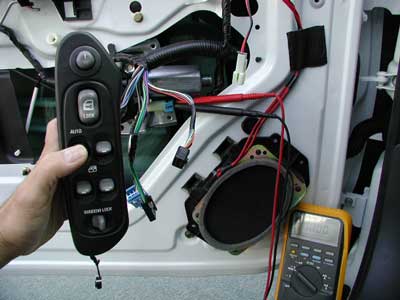
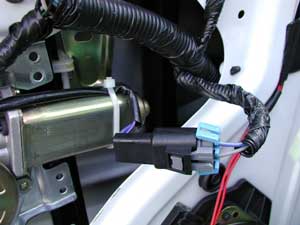
The door panel is lifted up and off of the door. The door panel is placed in a safe place out of harms way. The white liner in the upper right photo serves a few purposes. It is primarily a moisture barrier, but it also helps cut down on wind and road noise as well as keep drafts out of the car. This liner must be carefully peeled off and put aside. The next step is to properly diagnose the window problem. The first step in any diagnosis is a thorough visual check. Look for broken plastic guides and mounting parts, broken or frayed cables, etc. This style of mechanism is fairly frail and is very prone to breaking cables, guides, etc. If the unit check out visually, the window switch need to be plugged in and the ignition turned on to check the voltage at the motor. To properly check late model vehicles (most cars and trucks from 1980 up), the plus probe from the meter must be connected to one of the motor wires and the negative probe to the other wire. If you are using a digital meter, polarity is not important. With the switch depressed in both the up and down positions, we are getting a reading of 12.11 volts at the back of the motor. If the voltage reading in either position was 0 or below 11 volts, that would indicate that there is a problem elsewhere in the switches or wiring. Having 12 volts at the motor confirms that our switches and the wiring is working properly and the motor or regulator is defective.
|
|
|
|
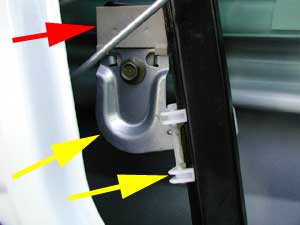
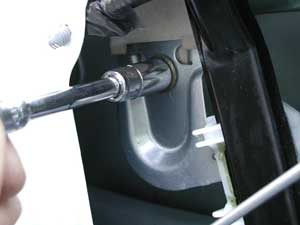
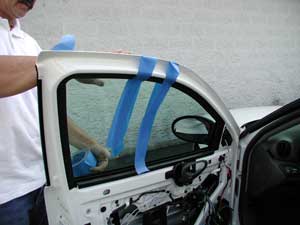
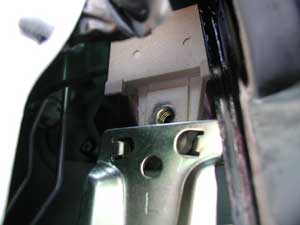
The above shots show how the regulator is attached to the glass. The plastic part with red arrow is permanently glued to the window (or at least it should be). This plastic bracket comes as part of the window assembly. It is not part of the regulator. The yellow arrows point to the window mounting bracket that is attached to the regulator assembly via the white plastic clips. These white plastic clips are not replaceable and if they are broken, will require replacing the entire motor and regulator assembly. There are 2 bolts holding the regulator to the glass. One on the bracket in the front track and one on the bracket in the rear track. These bolts are removed and the window is raised off of the brackets and secured into the top of the door. There are many different ways to secure the window, but we have chosen to use the blue long mask masking tape. This tape is available at any hardware store, it is UV safe (it won't get sticky or dry out in the sun) and safe to apply over almost any paint.
|
|
|
|
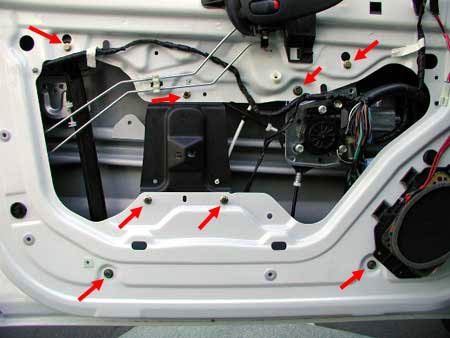
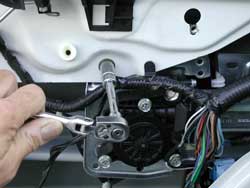
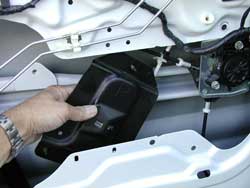
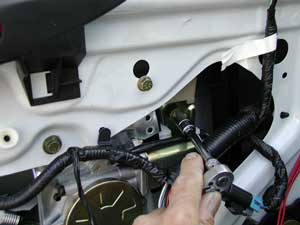
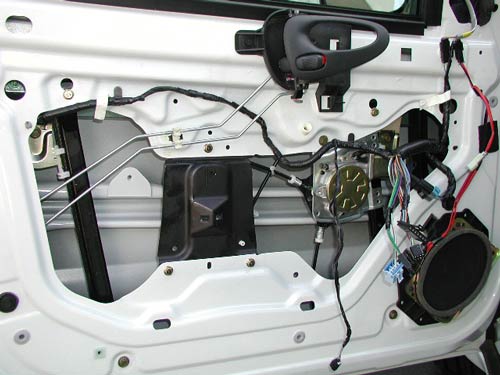
First the window motor wires are unplugged from the motor. Eight nuts/bolts need to be removed to get the regulator out of the door. These fasteners are marked with the red arrows in the photo above. Note that 3 of the nuts hold the black reinforcement plate in the door. This plate must be removed before the regulator is removed from the door. With all of the nuts, bolts and wires removed, the regulator and motor assembly is twisted and wiggled out of the opening in the door one track at a time.
|
|
|
|
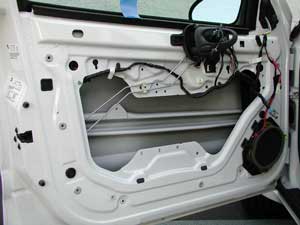
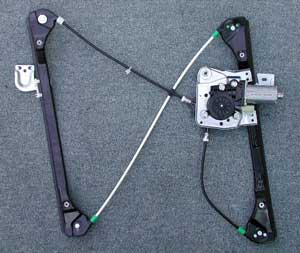
The shot above is with the regulator and motor assembly removed from the door. The original regulator we pulled out of the door is on the left. The replacement regulator is shown on the right. The replacement unit from A1 Electric is half the price of the original.
|
|
|
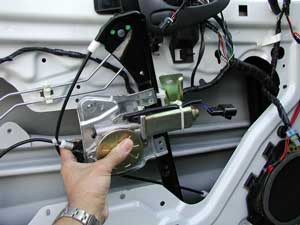 
The replacement assembly is wiggled into the door cavity and lined up with the mounting holes in the door. Installation is basically the reverse of removal. All 8 of the nuts and bolts are started and loosely threaded. With everything in place the new regulator and motor assembly is tightened into place. The motor wires are plugged back into the new motor (upper right photo). The tape is removed from the window and the the window is slowly lowered onto the mounting brackets on the regulator (lower left photo). With the window seated squarely on the brackets, the bolts are reinstalled and tightened.
|
|
|
This is a shot of our new regulator and motor assembly mounted in the door. The power window switch is plugged in and the window operation is checked. With everything working, the vapor barrier (dust shield), door panel and trim are reassembled. |